Traverse Standard v11.0
Contact Labels
Use the Contact Labels function to print mailing labels for your communications and campaigns. After you produce the labels, CRM automatically adds an activity record for the contacts you included to record that action.
Note: You can reference more detailed instructions in the Label Setup Tutorial in the Traverse Knowledge Base.
Note: If you select Campaign, CRM automatically adds an activity record for the contacts you included to record that action.
- Use the Data Filter to select the range of filtering options or leave the filter blank to include all available data.
- Select the group of contacts for which you want to create labels from the Contact Group field.
- Select the sorting criterion from the Sort By section.
- Select, if applicable, the Print All Addresses check box to print all addresses set up for the contact.
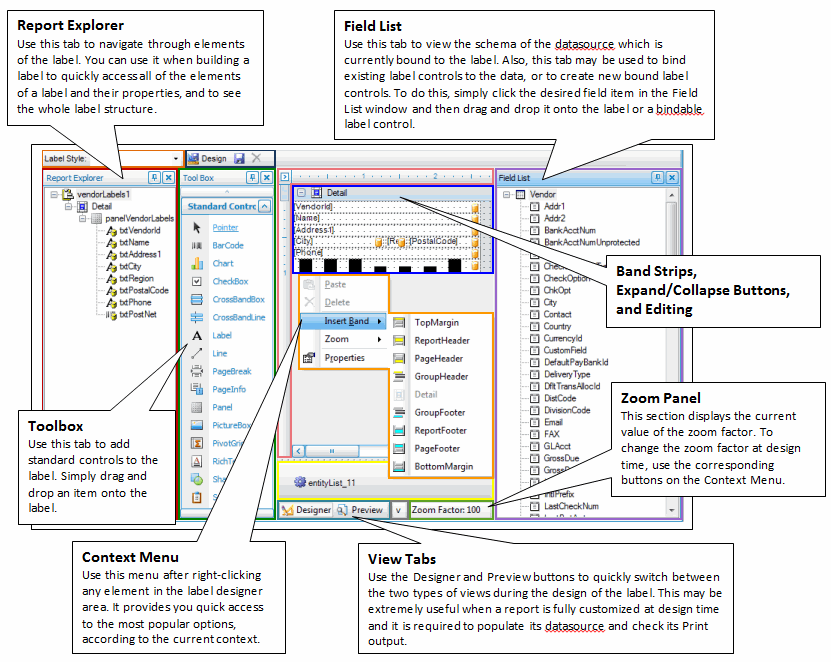
Note: If unchecked, only the contact's default address is printed. - Review the comments for the different areas of the example image below for information on the highlighted section.
- Click a command button to
| Select | To |
| Print the Contact Labels. | |
| Output | Output the labels as a PDF. |
| Send | Save the labels as a PDF and attach it to an email using your default mail program. |
| Preview | Preview the Contact Labels. |
| Reset | Reset all fields and lists to their default selections. |
